
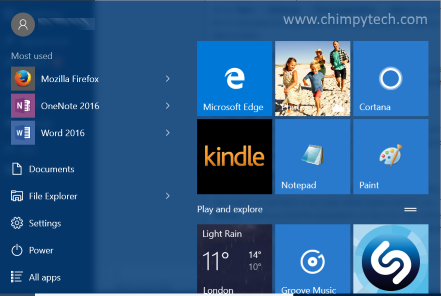
The re-introduction of the Windows 10 Start Menu was one of the most welcomed improvements from Windows 8.- but it is no longer the Start Menu of Windows 7, it is more like a hybrid between the Windows 8 tile screen and the more classic Start Menu. Some like it, some hate it.
No matter what your preference, it’s here to stay so you may as well make the most of it, and with these great, quick and easy tweaks you can really make the Windows 10 Start Menu work for you.
1. Resize
The Windows 10 Start Menu is bigger than its predecessors because it has a lot more information on it such as the live tiles etc, but it doesn’t have to be that big if you don’t want it to be. To change its size first open the Start Menu and then as with any other Window simply drag either the upper edge or right edge to make it either taller/shorter or wider / narrower.
2. Add more shortcuts to Windows Folders
By default the Windows 10 Start Menu doesn’t show all available system folders, but it’s possible to add as many (or delete some that you don’t want) with just a few clicks.
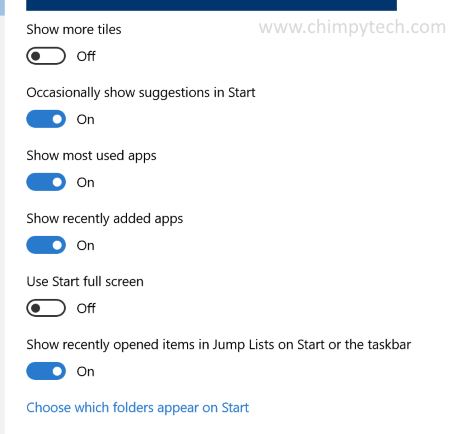
Click Start → Settings → Personalisation → Start. In the right hand pane at the bottom select the option marked ‘Choose which folder appear on Start‘. Using the sliders you can choose the folders you want to show / hide.
3. Magnify the Start Menu
If you are using a monitor with a very high resolution then it’s possible that your Windows 10 Start Menu might be a little too small to read comfortably, fortunately it is possible to make it larger without affecting its overall proportions.
Go to Start → Settings → System → Display and use the slider on the right hand side of the screen to increase the size of the Windows 10 Start Menu. Click the Apply button to accept the setting, you will now need to log out and back in again to complete the changes. This setting will also change the size of other parts of Windows 10 as well.
4. Use ‘Right Click’
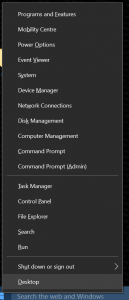
One thing the Windows 10 Start Menu has retained from its earlier cousins is the option to ‘right click’ on it and get a different set of options – here you will find quick shortcuts in to some very useful parts of the operating system.
5. Add shortcuts to your own folders
It is possible to add a shortcut to any of your own folders to the Windows 10 Start Menu – first navigate to the folder using Windows Explorer, right click it, and then select ‘Pin to Start‘ from the context menu.
Once you have done this you will find the folder by clicking the Start Menu button and then the ‘>’ to the right of the File Explorer entry, this will show the Jump List where your folder is displayed.
6. Change the Colours
If you are struggling to see the Start Menu clearly, it might help to change its colour. Click Start → Settings → Personalisation → Colours. We would suggest switching off ‘Make Start, taskbar and action center transparent’ along with switching on ‘Show colour on Start, taskbar and action center’. Finally, choose a colour you like from the colour palette or use the option to pick one automatically based on your desktop background.
7. Make the Start Menu full screen and still keep the Taskbar
This tweak is useful if you have a lot of live tiles and want to see all of them without having to activate Tablet Mode. Go to Start → Settings → Personalisation → Start and activate the option marked ‘Use Start full screen‘. Once this is activated the application buttons and shutdown options will be reduced to two small buttons above the Start Menu button.
8. Add your own Apps to the Live Tiles list
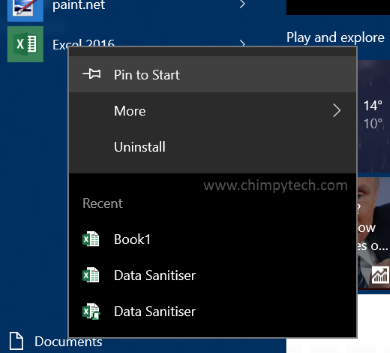
If there are Apps you want regular quick access to you can easily add them to the Live Tiles list. Simply find the App you want in the ‘All Apps’ list, right click it and select ‘Pin to Start‘ from the context menu. Note – This will pin them to the Live Tiles rather than the Apps list.
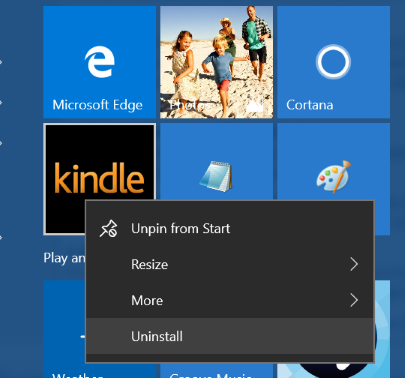
9. Fast App uninstall
Gone are the days of burrowing down in to the Control Panel to remove an App from your computer – so long as you have a live tile for the App you want to uninstall, then the process is as simple as right clicking on the appropriate Live Tile, and selecting Uninstall from the context menu.
10. Organise the Live Tiles
You can make best use of the Windows Live Tiles with a little bit of organisation. The tiles can be dragged around the Windows 10 Start Menu to put them in an order which works best for you. The tiles can be resized by right clicking and selecting ‘Resize’, and if you find the animations on the Live Tiles distracting they can be switched off by right clicking the tile hovering over the ‘More‘ option and selecting ‘Turn live tile off‘