Customising the Windows 11 Start Menu
The Start Menu is one of the most recognisable parts of Windows 11 and one of the easiest areas to personalise. Although Microsoft simplified its design, you still have several useful options to tailor it to your workflow. In this guide, we will walk through each customisation feature step by step. Additionally, we will highlight small tweaks that can make everyday navigation feel smoother and more intuitive.
Understanding the New Start Menu Layout
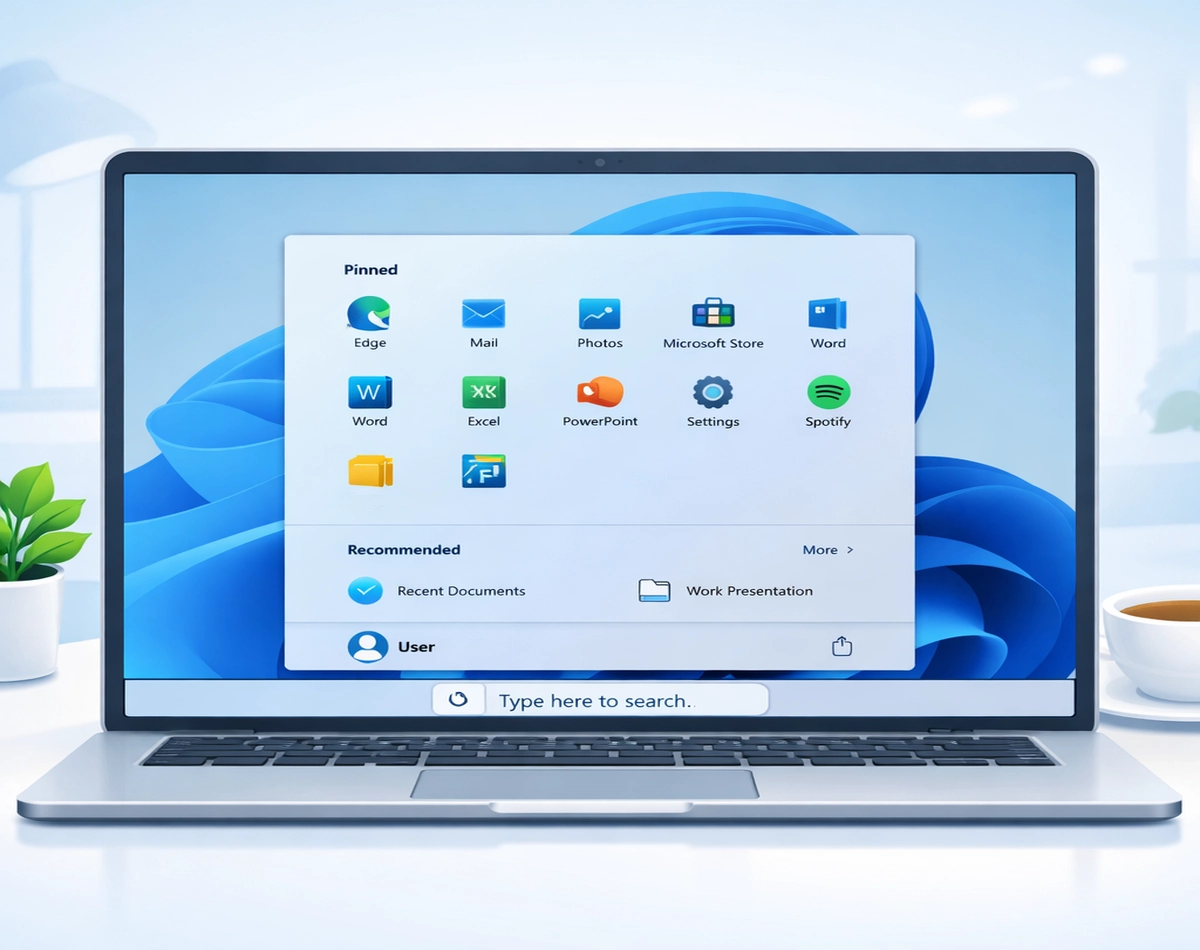
Before you begin customising anything, it helps to understand how the Start Menu is structured. At the top, you will find your pinned apps. Beneath that, you will see the Recommended section, which shows recently opened files and newly installed apps. Finally, at the bottom, you will find your account options and the power button. For a full explanation of the Start Menu click here
Although the layout is fixed, you can still adjust what appears in each section. As you explore the options below, you will notice how each change gradually shapes the Start Menu into something that feels more personal.
Pinning and Unpinning Apps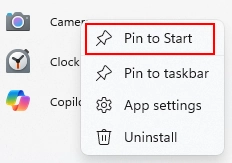
One of the quickest ways to customise the Start Menu is by adjusting your pinned apps. To pin an app, simply right-click it in the Start Menu or the All Apps list and choose Pin to Start. Conversely, if you want to remove something, right-click the pinned icon and select Unpin from Start.
As you continue pinning and unpinning apps, you will naturally create a layout that reflects your most frequent tasks. This makes the Start Menu far more efficient, especially if you prefer quick access to your essential tools.
Rearranging Pinned Apps
After pinning your favourite apps, you can rearrange them to create a layout that feels logical. To move an app, click and drag it to a new position. As you shift icons around, Windows automatically adjusts the grid, which helps keep everything tidy.
Because the Start Menu uses a simple grid system, you can group similar apps together. For example, you might place productivity tools on the top row, entertainment apps on the second row, and system utilities on the third. As a result, you will spend less time searching and more time working.
Creating App Folders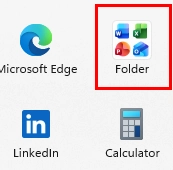
Windows 11 also allows you to create folders inside the Start Menu. This is especially helpful if you have many pinned apps. To create a folder, drag one pinned app on top of another. Windows instantly creates a folder, and you can then add more apps by dragging them into it.
Once your folder is created, you can click it to expand the contents. You can also rename it by selecting the text area above the icons. As you build folders, you will notice how much cleaner the Start Menu becomes, particularly when you group related apps such as browsers, office tools, or games.
Adjusting the Start Menu Layout (More Pins or More Recommendations)
Windows 11 includes a simple layout option that lets you choose between More pins, More recommendations, or the default Balanced layout. To change this, open Settings, then choose Personalisation, and finally select Start.
If you prefer quick access to apps, choose More pins. Alternatively, if you rely heavily on recent files, choose More recommendations. As you switch between these layouts, you will quickly see how each one changes the overall feel of the Start Menu.
Managing the Recommended Section
Although the Recommended section can be helpful, some users prefer a cleaner look. Fortunately, Windows 11 allows you to control what appears there. Inside Settings, under Personalisation and Start, you will find options to hide recently added apps, recently opened items, and frequently used files.
As you toggle these settings, the Recommended area becomes more focused or more minimal, depending on your preference. This gives you greater control over what Windows surfaces, which can be especially useful if you value privacy or simply prefer a tidier interface.
Choosing Which Folders Appear Next to the Power Button
At the bottom of the Start Menu, you can add shortcuts to common folders such as Documents, Downloads, Pictures, Network, and Settings. To customise these, go to Settings, then Personalisation, then Start, and finally Folders.
Once you enable a folder, its icon appears next to the power button. This small change can significantly speed up navigation, especially if you frequently access certain directories. As you experiment with these options, you will discover which shortcuts genuinely improve your workflow.
Changing the Start Menu Colour and Background Accent
Although the Start Menu does not support full background images, you can still influence its appearance through accent colours and themes. To adjust these, open Settings and choose Personalisation, then Colours.
If you enable Show accent colour on Start and taskbar, Windows applies your chosen colour to the Start Menu’s highlight elements. As you try different colours, you will notice how the Start Menu subtly shifts to match your overall theme.
Using the Start Menu with Light or Dark Mode
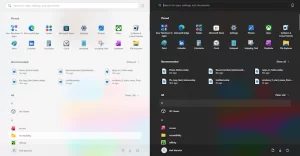
Another visual customisation involves switching between Light and Dark mode. You can find this option under Settings, Personalisation, and Colours. When you change the mode, the Start Menu updates instantly.
As you explore these modes, you may find that Dark mode feels more comfortable in low light, while Light mode offers better visibility during the day. Because the Start Menu adapts automatically, this change affects the entire interface in a consistent way.
Final Thoughts
Customising the Windows 11 Start Menu is a simple yet effective way to make your PC feel more personal. As you adjust pinned apps, create folders, tweak layout options, and refine visual settings, you will gradually build a Start Menu that supports your daily workflow. Although the customisation options are not as extensive as previous versions of Windows, they still offer enough flexibility to create a clean, efficient, and visually cohesive experience.