Using The Kaspersky Rescue Disk
If you have become infected with any kind of computer malware the best way to clean the infection is to use an ‘offline’ Scanner and removal tool rather than one running though the operating system itself.
What is offline scanning, and why is it better?
Offline scanning is a term used to describe the process of scanning a computer for malware without booting up the operating system installed on that computer. This is usually accomplished by having a recovery CD (or USB Stick) onto which a recovery system has been installed, and booting the machine from that disk.
This technique is preferable to booting in to the operating system first and then scanning as there are some types of malware (known as ‘Rootkits’) that are able to hide themselves from the operating system at boot up time, and thus avoid detection. But, If you don’t boot into the Operating system first, the malware cloaking isn’t running and detection is actually much easier.
One of our favourite and tools for doing this scan is the Kaspersky Rescue Disk, which is a bootable CD containing a Linux based version of the well respected Internet security suite.
Obtaining and using the Kaspersky Rescue Disk
There are three ways that you can get your hands on a Kaspersky Rescue CD
- If you own a disk that you purchased, then this is already a rescue CD and can be used to boot your PC.
- You can download the ISO from Kaspersky and then burn it to a CD to create a Rescue Disk (Click here for the Kaspersky webpage with instructions for downloading)
- If you know someone with a clean PC running Kaspersky, then you can use that installation to create the rescue disk (Click here for the Kaspersky webpage with instructions)
Once you have a physical rescue disk in your hand, the next step is to boot your PC, from the disk, this involves having the CD in the drive when you power on the PC, and then booting in to the disk (Note – depending on your system set-up you may have to change the boot order on your PC, this is usually done either with an ‘F’ key press at startup, or by changing the BIOS, as all PC’s are different it is impractical in this tutorial to provide exact instructions for your PC).
Once you have started the boot process form the CD you will see a screen with a countdown something like the one below – press any key on the keyboard before the countdown reaches zero to boot the CD, if you don’t press a key in time, the PC will boot the hard drive as normal instead.

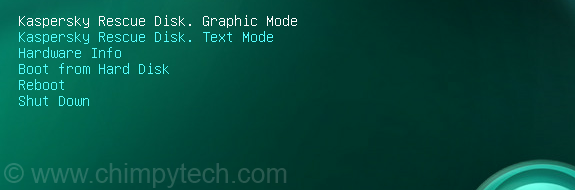
Once the PC has booted you will see the Startup screen below, for the purposes of this tutorial you will need to select the ‘Graphical Mode’ option and press ‘Enter’
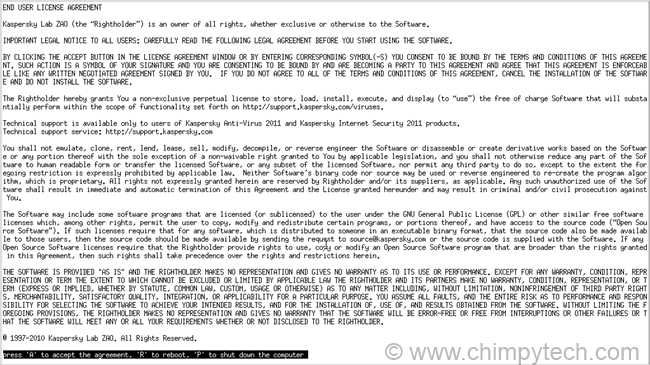
Next you will see the License Agreement – you will need to press the ‘A’ key to accept the agreement and proceed from here. (Some users report that you need to use a capital ‘A‘ and others report that only a lower case ‘a‘ will work so you may need to try both to proceed)
Once you have cleared the License agreement you will see the main scan screen shown below.

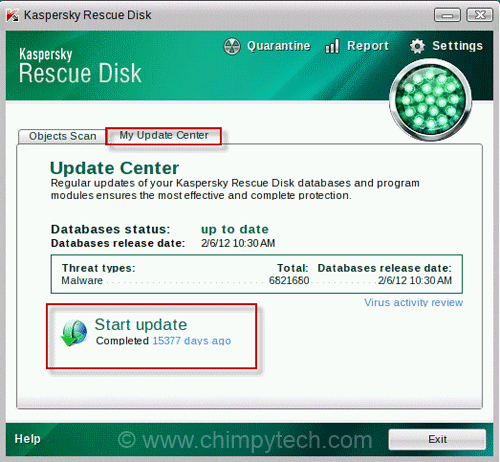
The first thing you will need to do is flip the screen to the ‘My Update Center‘ screen and then hit the ‘Start Update‘ button to make sure you have the latest Anti-Virus definitions. You will obviously need to be connected to the Internet to do the update, the drivers in the Kaspersky may not recognise your wireless card so we recommend that you connect to your router via an Ethernet cable.
Once you have updated your definitions database you can return to the ‘Objects Scan‘ tab, select the drives you wish to scan by ticking the appropriate boxes and then click the ‘Start Objects Scan‘ button.
The rescue CD will now proceed to scan your drive(s) and clean them of all known infections, and then provide you with a report at the end.

Once everything is complete you can exit the recovery environment and re-boot your PC in to your Operating System
Related Articles
Using Kaspersky TDSS Killer – The trouble free way to remove Rootkits