User Account Lockout Part 1 – Setting the Audit Policy
Many of us are used to having some sort of limit on the amount of times we can use a password or PIN incorrectly before being locked out, such as our Credit Card PIN, or our online banking password. Too many failed attempts and for security reasons you are locked out until some form of administrator resets things for you.
By default users can repeatedly try the same password over and over again in Windows 7 and 8.1 without ever being locked out, which does make Windows slightly vulnerable to brute force attacks on the password.
So in this short series of tutorials we will show you how to set-up a security policy that will limit the amount of failed password attempts that a User Account can have before activating the User Account Lockout feature.
Note – to follow this series of tutorials you must be logged on with Administrator privileges, and the PC that you’re setting the User Account Lockout policy on must not be connected to a domain.
To access the Security Policy console do one of the following procedures depending on your operating system
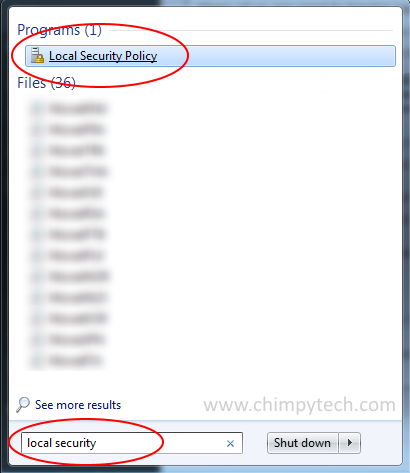
Windows 7
Click the Windows Orb, and type ‘Local Security‘ into the search box.
From the list of search results click the ‘Local Security Policy‘ option.
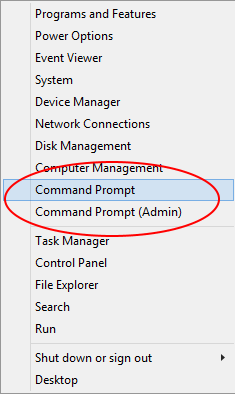
Windows 8.1
Right click the Windows logo and click the option ‘Command Prompt‘ (or Command Prompt (Admin) if you aren’t already logged in as an Administrator)
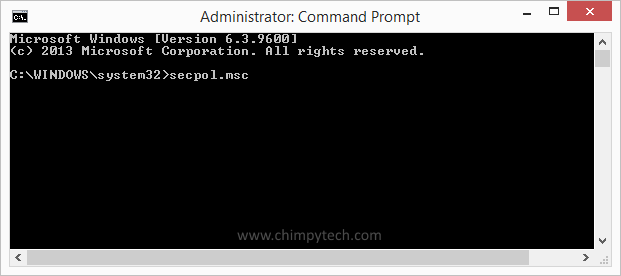
When the Command Prompt windows opens type in secpol.msc and press Enter
For all versions of Windows
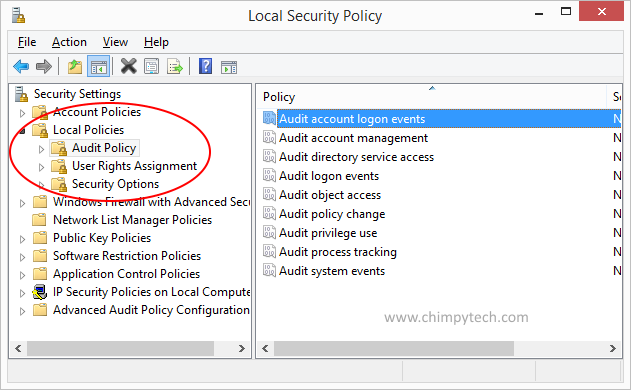
Once you have opened the Local Security Policy console you will see a screen something like the one below
Expand the Local Policies branch, and highlight the ‘Audit Policy‘ option, in the right hand pane double click the policy marked ‘Audit account logon events‘.
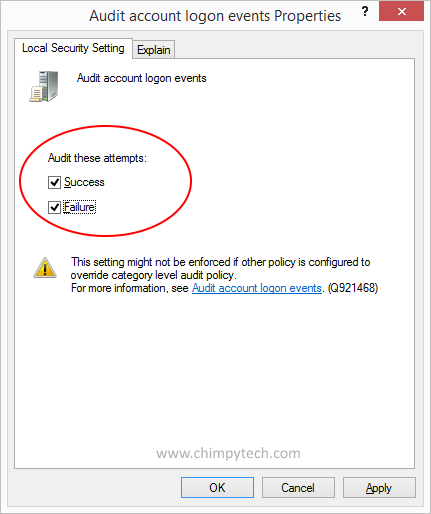 In the next dialog that appears make sure that the ‘Success‘ and ‘Failure‘ boxes are both ticked.
Click on ‘Apply‘ to accept your changes and then ‘OK‘ to close the dialog box.